In this tutorial, I will show you the steps I took to create a New Year greeting card with golden stars and snowflakes on a red background using Adobe Photoshop CS6. We will use advanced compositing techniques, Layer styles, custom shapes and brushes to get an impressive holidays design. Layered PSD file included. Let’s get started!
Final Image Preview

Start working by creating a new document (Ctrl+N) in Adobe Photoshop CS6 with the size 1920px by 1200px (RGB color mode) at a resolution of 72 pixels/inch.
Create a new layer, click on Add a layer style icon from bottom part of the Layers panel and select Gradient Overlay.

Click in the color bar to open the Gradient Editor and set the color stops as shown. Click OK to close the Gradient Editor dialog box.

We’ve got the next background for our greeting card:

Next we’ll download set of custom shapes named Decorative Snowflakes Shapes. Little tutorial to explain how to load Custom Shapes here.

Next we’ll create a pattern for our background, create a new document with the size 68px by 76px (RGB color mode) at a resolution of 72 pixels/inch, select the Custom Shape Tool (U) in the Tools bar, in the Options bar click the Shape to open the selection menu. Find the next downloaded shapes at the bottom of the menu, and then double-click a shape thumbnail to select it.

Click and drag to draw four snowflakes from the downloaded set to represent the next shown pattern. Their color is white and the background layer we’ll fill for a while in black with the Paint Bucket Tool (G).

Hide the black background layer and choose Edit > Define Pattern. Enter a name for the pattern in the Pattern Name dialog box.
Get back to the main document and create a new layer, go to Edit > Fill, in the Fill dialog box, for Use, choose Pattern, in the Custom Pattern pop-up panel select recent created pattern, and click OK.

Set Fill to 21% for this layer and change the Blending mode to Overlay.

Insert the mask on the same layer by choosing Add layer mask on the bottom part of the Layers panel and choose the Soft Round brush of black color (set Opacity to 15% in Options bar).

Paint in the mask using this brush to hide the pattern’s layer along its edges the same way demonstrated next picture.

On the central part of the holiday card we’ll introduce the digits of the next year. Select the Horizontal Type tool (T). Select a font, size and color in the Character panel. I used this font from FontSquirrel.

Click in the canvas and type ’2014′. Press Enter to apply the text.

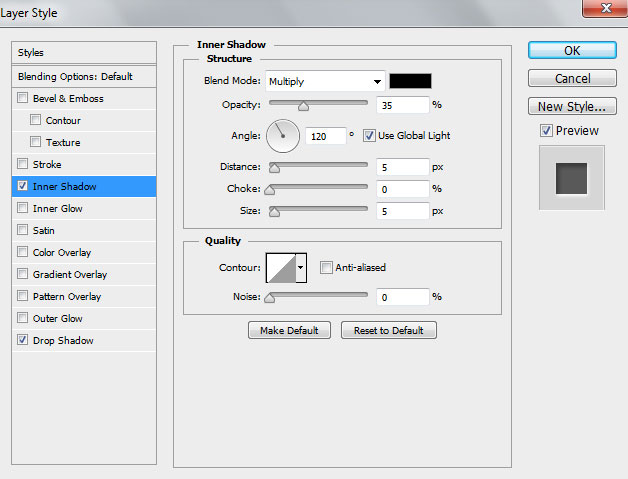
Click on Add a layer style icon from bottom part of the Layers panel and select Inner Shadow.
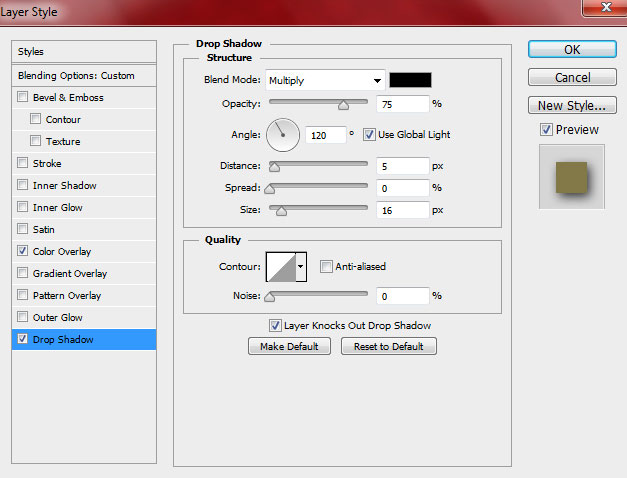
Add Drop Shadow:
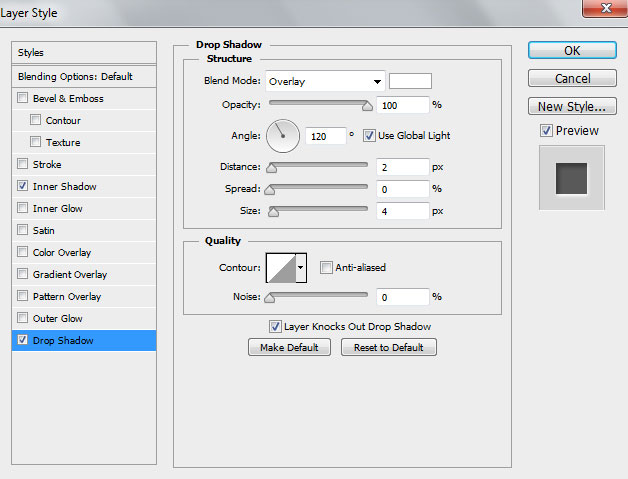
We’ve got the next result:

Insert also the greeting text. Select the Horizontal Type tool (T). Select a font, size and color in the Character panel. I used this font from FontSquirrel.

Click in the canvas and type ‘Happy New Year’. Press Enter to apply the text.

Click on Add a layer style icon from bottom part of the Layers panel and select Gradient Overlay.
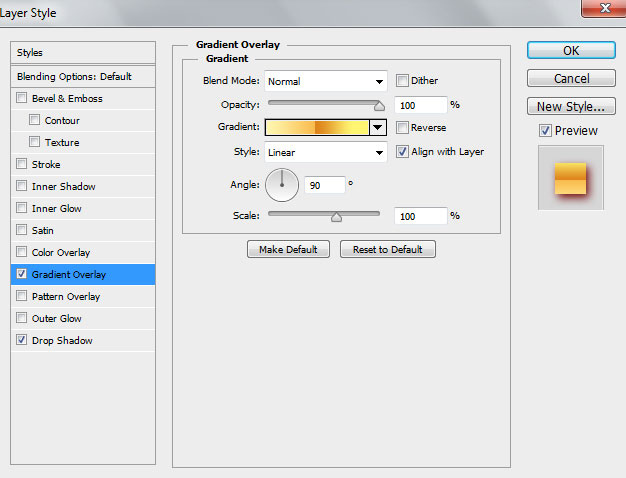
Click in the color bar to open the Gradient Editor and set the color stops as shown. Click OK to close the Gradient Editor dialog box.

Add Drop Shadow:
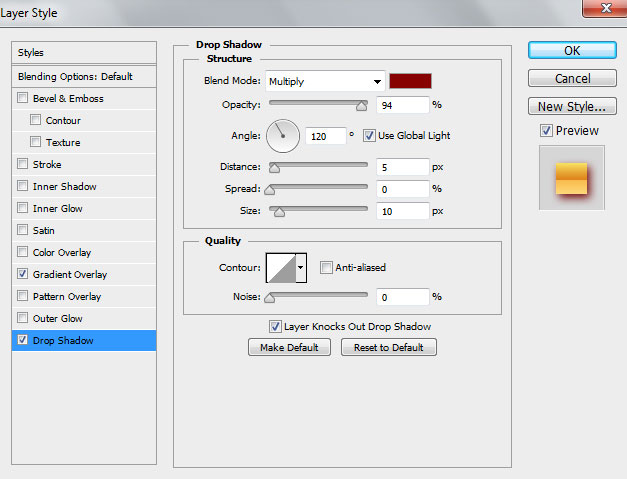
We’ve got the next result:

Next we’ll represent a small star with the three rays of the color #F2E18A, select the Polygon Tool (U), go to Options bar and click on Polygon Options. Set Indent Sides by – 30% and check the Star. Also set in Options bar the Sides – 3.

Click and drag to draw the star as shown:

Make a copy of the last represented layer and select the Free Transform (Ctrl+T) command to turn over the copy’s layer as it is indicated below:

Choose the Pen Tool (P) to give some volume to the star’s rays, set the drawing mode on Shape Layers in Options bar and draw the next shape as shown with #820101 color.

Insert the mask on the same layer by choosing Add layer mask on the bottom part of the Layers panel and choose the Soft Round brush of black color (set Opacity to 30% in Options bar).

Paint in the mask using this brush to change the visibility of the shape to get the same result from the next image:

This way we may give volume to the other rays too, applying the same tools.

Combine in a group all the star layers (press CTRL button to select the necessary layers and hold on the left mouse’s button while dragging the selected layers on Create a new group icon from bottom part of the Layers panel).
Apply the next settings for made group by clicking on Add a layer style icon from bottom part of the Layers panel and select Color Overlay.

Add Drop Shadow:
We’ve got the next result: