This tutorial is an example of how a few simple techniques can be used to create an amazing space scene using multiple layers, masking, the Brush tool, some basic lighting and one simple noise texture. Using the processes here, you will be able to apply the same techniques to create your own look. Layered PSD file included. Let’s get started!
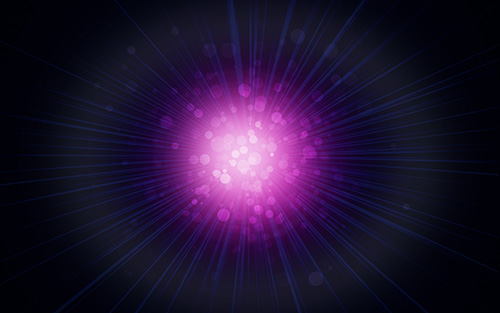
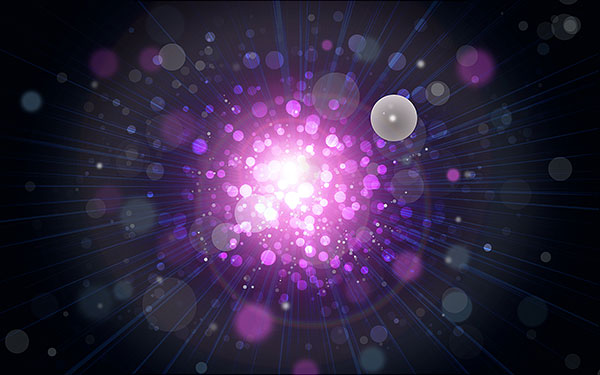
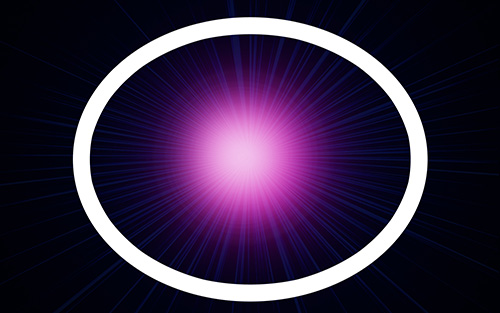
Final Image Preview
Start working by creating a new document (Ctrl+N) in Adobe Photoshop CS5 with the size 1920px by 1200px (RGB color mode) at a resolution of 72 pixels/inch. Use the Paint Bucket Tool (G) to fill with #090F27 color the new background layer.

Next we’ll create a new layer.
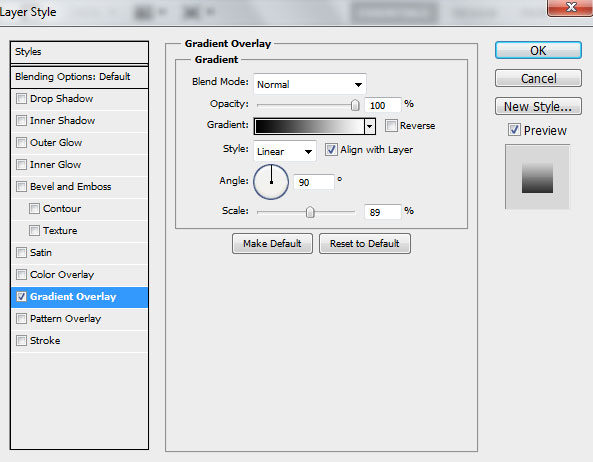
Set Fill to 0% for this layer and click on Add a layer style icon from bottom part of the Layers panel to select Gradient Overlay.
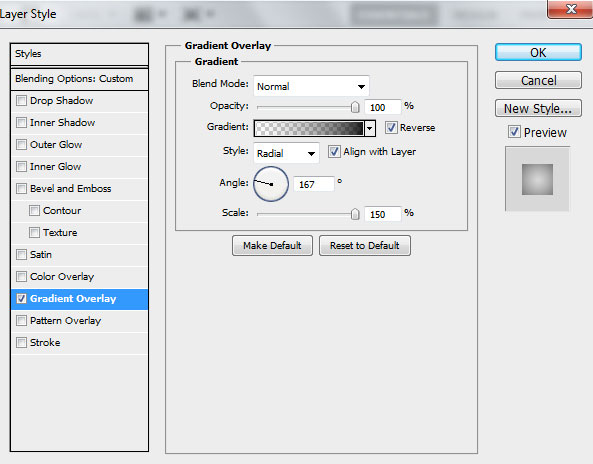
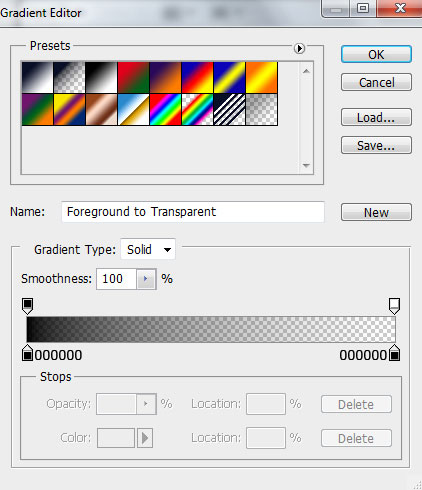
Click in the color bar to open the Gradient Editor and set the color stops as shown. Click OK to close the Gradient Editor dialog box.
We’ve got the next result:

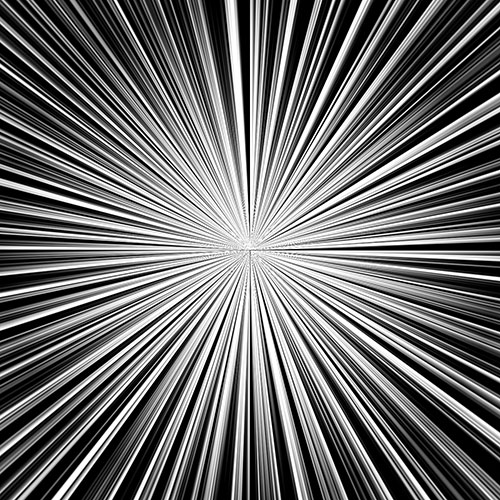
Now we have to represent the rays on the canvas by creating a new document (Ctrl+N) with the size 1200px by 1200px (RGB color mode) at a resolution of 72 pixels/inch.
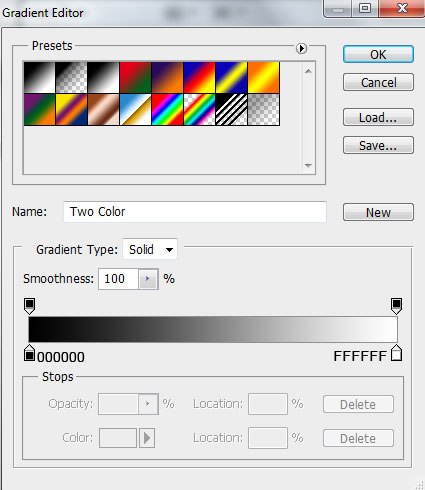
Click on Add a layer style icon from bottom part of the Layers panel and select Gradient Overlay.
Click in the color bar to open the Gradient Editor and set the color stops as shown. Click OK to close the Gradient Editor dialog box.
We’ve got the next result:

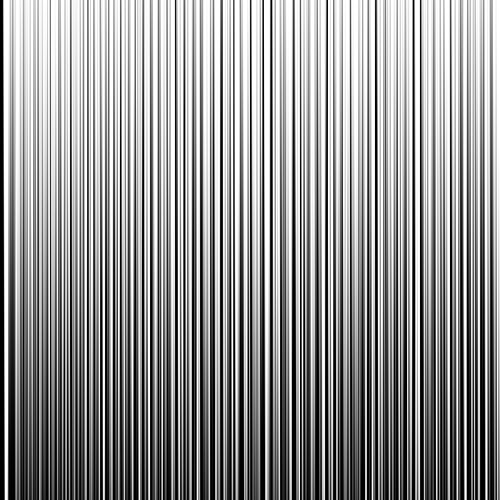
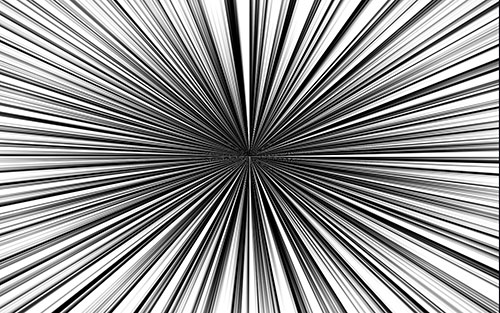
The new layer we’ve got needs to be rasterized. In this case create a new layer above the previous one and select them both in Layers panel. Then press CTRL+E to Merge Down and finally apply the next filter for the rasterized layer: Filter > Distort > Wave.

We’ve got the next result:
Use on the layer also Filter > Distort > Polar Coordinates.
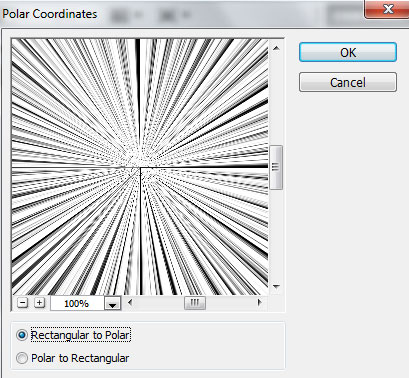
We’ve got the next result:
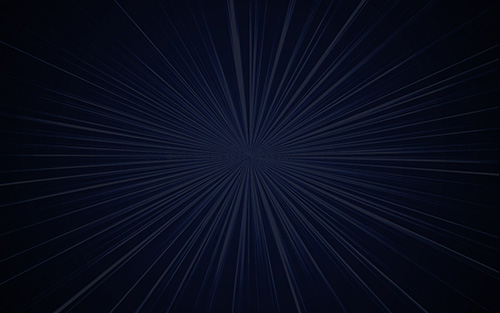
Then insert the rays’ layer on our first document we’ve made. Choose the Free Transform (Ctrl+T) command to stretch out the rays along the canvas’s size.
Set Fill to 9% for this layer and change the Blending mode to Divide.
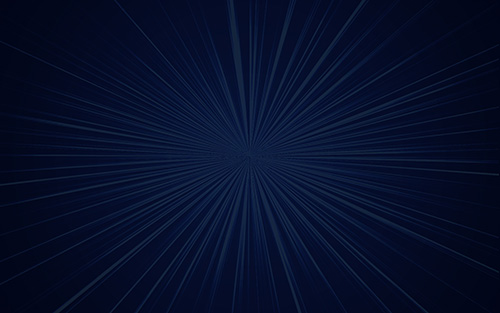
Create a new layer and select the Paint Bucket Tool (G) to fill the layer with #28828F color.

Set Fill to 50% for this layer and change the Blending mode to Hard Light.
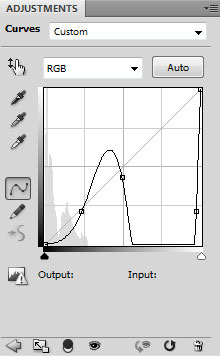
Click Create new fill or adjustment layer from bottom part of the Layers panel and click to Curves to adjust the curve shape as shown to make a little color corrections.
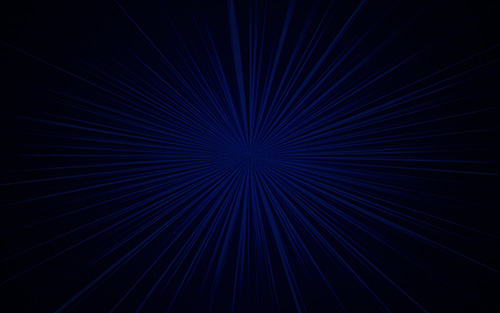
We’ve got the next result:
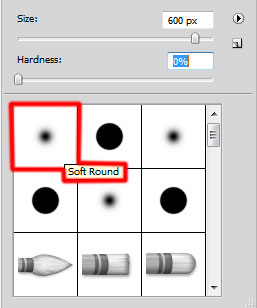
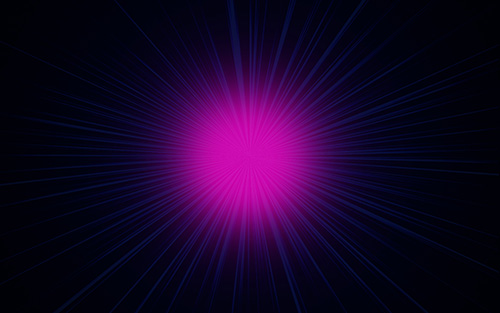
Create a new layer again and apply here the Soft Round brush to paint the background with #FF00CB.
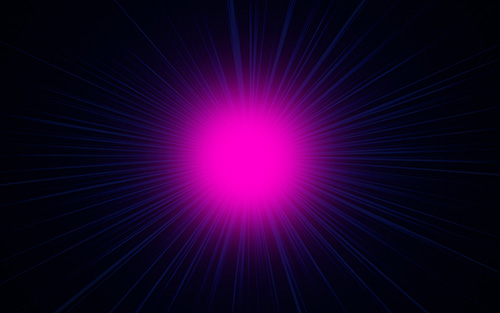
We’ve got the next result:
Set Fill to 80% for this layer and change the Blending mode to Lighten.
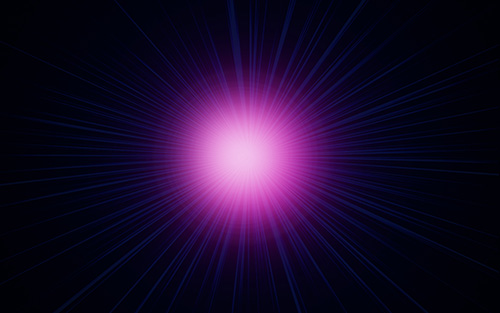
Next we’ll represent one more new layer and apply here the same brush, but of a smaller diameter and have a multiple click on the central part of the canvas. The brush’s color is white (brush Opacity – 20%).
Using the Ellipse Tool (U), we’ll represent an ellipse now.
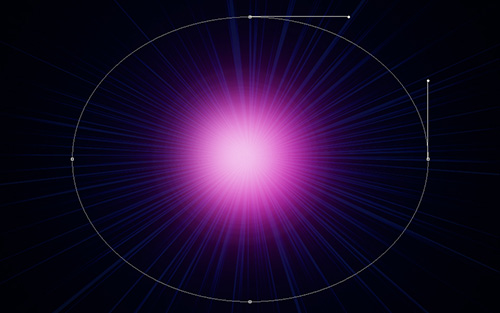
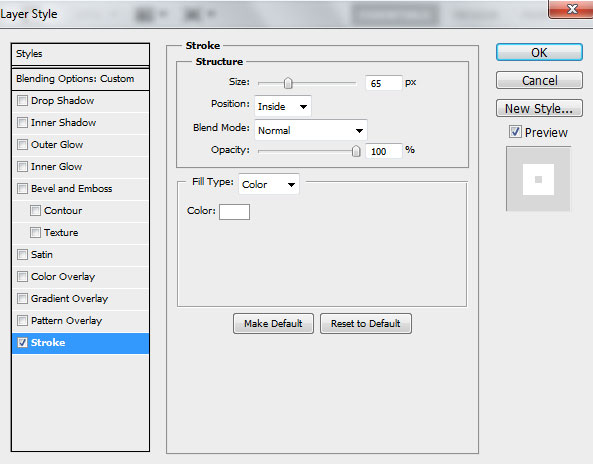
Set Fill to 0% for this layer and click on Add a layer style icon from bottom part of the Layers panel to select Stroke.
We’ve got the next result:
Let’s rasterize now the layer containing the ellipse element the way we did earlier. On the rasterized layer apply the next filter: Filter > Blur > Gaussian blur.
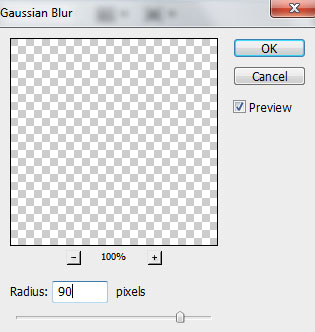
We’ve got the next result:
Set Fill to 30% for this layer.
Create a new layer, applying on it the Hard Round brush of white color to represent many small circles. In this case we need to use the brush with different diameters and Opacity value.
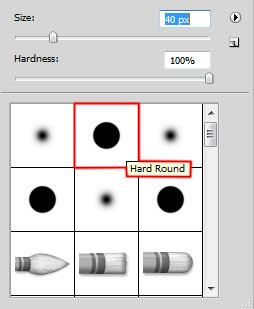
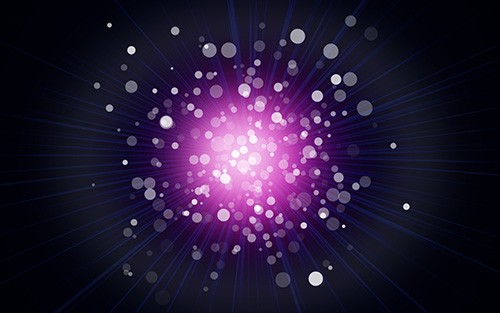
We’ve got the next result:
Set Fill to 50% for this layer and change the Blending mode to Overlay.